OpenClaw has exploded in popularity, earning over 135,000 GitHub stars in just weeks. However, this OpenClaw security guide exists because every self-hosted AI agent introduces real risks the moment it goes live. Your agent can execute shell commands, read files, send emails, and browse the web on your behalf. Without proper hardening, a single misconfiguration can hand all of that power to an attacker.
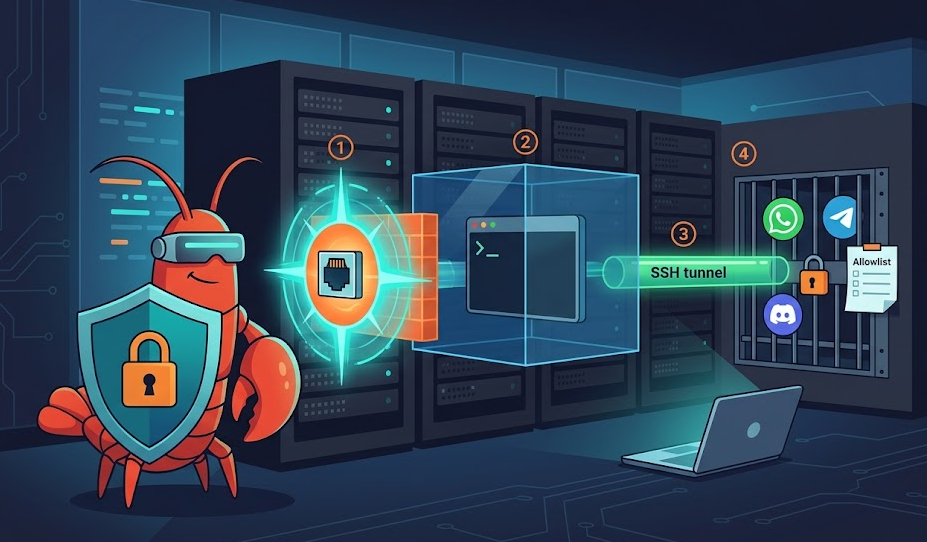
This article walks you through four critical layers of defense. First, you will lock down the gateway. Then you will sandbox tool execution inside Docker containers. After that, you will set up SSH tunnels for safe remote access. Finally, you will allowlist channels so only trusted users can reach the agent. By the end, your deployment will follow the same hardening patterns recommended by the official OpenClaw documentation.
OpenClaw Security Guide Step 1: Gateway Hardening
The gateway is the heart of every OpenClaw deployment. It listens on port 18789 by default and routes all traffic between messaging channels, model inference, and tool execution. Because everything flows through this single port, it is the most important surface to protect.
Bind to Localhost Only
Your first move is to verify the gateway binds to 127.0.0.1 and not 0.0.0.0. Many early tutorials accidentally exposed the gateway to the public internet. Anyone who discovers your server IP can then reach the agent’s web interface. From there, they control your calendar, your email, and your filesystem.
Open ~/.openclaw/openclaw.json and confirm these settings:
{

  "gateway": {

    "bind": "127.0.0.1",

    "port": 18789,

    "auth": {

      "enabled": true,

      "mode": "token",

      "token": "replace-with-a-long-random-string"

    }

  }

}
After saving, verify the binding with this command:
ss -tlnp | grep 18789

# Expected: 127.0.0.1:18789

# Red flag: 0.0.0.0:18789
Enable and Rotate Token Authentication
Even with localhost binding, always enable gateway auth. Defense in depth means you plan for the day a tunnel breaks or a firewall rule drifts. Treat your gateway token like an API key. Store it in your .env file, never in a shared repo. Also, rotate the token on a regular schedule.
Run the Built-in Security Audit
OpenClaw includes a security audit command that catches common mistakes. Run it after every configuration change:
openclaw security audit --deepThis command flags exposed APIs, permissive tool policies, weak filesystem permissions, and dangerous channel configurations. Fix every CRITICAL and WARNING finding before you start the agent. Furthermore, the –fix flag can automatically apply safe defaults for some issues.
OpenClaw Security Guide Step 2: Docker Sandboxing
Without sandboxing, every command the agent runs hits your host machine directly. If a prompt injection tricks the model into running rm -rf /, nothing stops it. Docker sandboxing adds a containment layer between the agent and your system. Therefore, it belongs in every production OpenClaw security guide.
How the Sandbox Works
The gateway stays on the host. Tool execution runs inside an isolated Docker container. Each container gets its own workspace, and you control network access, filesystem mounts, and resource limits. This is not a perfect security boundary, but it limits the damage when something goes wrong.
Build the sandbox image first:
scripts/sandbox-setup.shThen enable sandboxing in your configuration:
{

  "agents": {

    "defaults": {

      "sandbox": {

        "mode": "all",

        "scope": "agent",

        "workspaceAccess": "rw",

        "docker": {

          "image": "openclaw-sandbox:bookworm-slim",

          "network": "none"

        }

      }

    }

  }

}
Choose the Right Sandbox Settings
Mode controls which sessions run inside containers. Set it to “all” for maximum protection. Alternatively, “non-main” sandboxes secondary sessions only, which works as a reasonable starting point.
Network defaults to “none”, blocking all outbound traffic from the container. This prevents data exfiltration even if the model follows a malicious prompt. Only change this setting if a specific tool requires internet access.
Scope determines container isolation boundaries. Per-agent scope gives each agent its own container. Per-session scope creates a fresh container for every conversation. For most setups, per-agent scope strikes a good balance between isolation and performance.
Consider Rootless Containers
Standard Docker runs a daemon as root. A container escape gives the attacker full root access to the host. Podman in rootless mode avoids this risk entirely. With Podman, an attacker who breaks out of the container lands as an unprivileged user. As a result, they can only access the openclaw user’s home directory, not the entire system.
Secure Remote Access: SSH Tunneling and VPN Options
If your agent runs on a VPS, you need remote access to the gateway. However, opening port 18789 to the public internet ranks among the most dangerous mistakes in any OpenClaw deployment. Instead, use SSH tunnels to forward traffic over an encrypted connection.
Set Up a Basic SSH Tunnel
Run this from your local machine:
ssh -N -L 18789:127.0.0.1:18789 user@your-vps-ipThis maps your local port 18789 to the VPS gateway through an encrypted SSH channel. You can then open http://127.0.0.1:18789 in your browser. The gateway behaves as if it runs locally, but it actually sits on the remote server.
For a persistent tunnel, wrap this in an SSH config entry or a systemd service. That way, the tunnel reconnects automatically after reboots.
Harden SSH on the VPS
Because SSH becomes your primary access method, you must harden it properly. Disable password authentication and require key-based login only:
sudo nano /etc/ssh/sshd_config

PasswordAuthentication no

PubkeyAuthentication yes

PermitRootLogin no

sudo systemctl restart sshd
Also, create a dedicated non-root user for the agent. Never run OpenClaw as root. If the agent gets compromised, the attacker only inherits that limited user’s permissions.
Tailscale and WireGuard as Alternatives
For always-on access across multiple devices, Tailscale or WireGuard work better than manual SSH tunnels. Tailscale creates an encrypted mesh network between your devices and the VPS in minutes. Furthermore, Tailscale Serve can expose the gateway only within your tailnet, with no public port forwarding required. For teams, this is usually the most practical choice.
OpenClaw Security Guide Step 3: Channel Allowlisting
Channels are your real perimeter. Most OpenClaw security failures happen when someone enables a messaging channel and forgets access controls. The agent then responds to strangers in DMs or activates in random group chats.
Set the DM Policy per Channel
OpenClaw supports several DM policy modes. The default “pairing” mode sends unknown senders a short code. The bot ignores their messages until you approve the code. Codes expire after one hour.
For production, switch to “allowlist” mode to restrict access to specific user IDs:
{

  "channels": {

    "whatsapp": {

      "enabled": true,

      "dmPolicy": "allowlist",

      "allowFrom": ["+15551234567"]

    },

    "telegram": {

      "allowFrom": ["123456789"],

      "groups": {

        "*": { "requireMention": true }

      }

    }

  }

}
Lock Down Group Chats
Always set “requireMention”: true for every group. Without it, the agent processes all messages in the group. This dramatically increases the risk of prompt injection from other members. In addition, use “groupAllowFrom” to control which groups the agent can join.
Start With One Channel, Then Expand
Begin with a single channel. Confirm that your access controls block unauthorized users. Then add the next channel. Most importantly, never combine “dmPolicy”: “open” with “allowFrom”: [“*”]. The security audit tool flags this combination as a critical error.
Additional Hardening Tips for Your OpenClaw Security Guide
Pick a Strong AI Model
Model choice affects security directly. Older or smaller models resist prompt injection far less effectively. For agents with tool access, always use the strongest available instruction-hardened model. This matters especially for hook-driven automation, where the agent ingests external content like emails or web pages.
Scope Tool Access With Allowlists
Even inside a sandbox, restrict which commands the agent can run. Create a shell allowlist that only permits safe utilities: ls, cat, grep, head, tail. Also configure filesystem allowlists to limit readable and writable directories. Denylists fail because attackers find alternatives. Allowlists are exhaustive by design.
Protect Secrets and Credentials
Never let the agent read your SSH keys. Use ssh-agent and per-project keys instead of long-lived credentials. Prefer scoped, read-only tokens wherever possible. Also, keep secrets out of .env files that the agent can access. Ensure the memory feature never stores sensitive data. In addition, lock down permissions on ~/.openclaw because session logs may contain conversation history and operational details.
Frequently Asked Questions About OpenClaw Security
Docker is not strictly required, but it adds a valuable containment layer. Without sandboxing, every tool runs directly on the host. For any production deployment, Docker or Podman sandboxing is strongly recommended.
Anyone who finds your server IP can access the agent’s web interface. Because the agent can run commands and send messages, this equals giving a stranger remote control. Always bind the gateway to localhost and use a private tunnel for access.
SSH into the VPS and edit ~/.openclaw/openclaw.json directly. Update the allowlist or switch the DM policy. Then restart with openclaw gateway restart and run openclaw doctor to verify.
Both are solid options. SSH tunnels require no extra software on the VPS. However, Tailscale is better for always-on, multi-device access because it creates a persistent encrypted network. For teams or mobile access, Tailscale is typically easier to maintain.
Run openclaw security audit –deep after every config change and at least weekly during active use. Also run it after updating OpenClaw, because new versions can change defaults or add new checks.
Conclusion: Put This OpenClaw Security Guide Into Action
Securing your OpenClaw agent is not a bonus step. It is a requirement. Your agent can execute commands, access files, and act across messaging platforms. A single exposed port or open DM policy can compromise everything.
Start with the gateway: bind it to localhost, enable token auth, and run the audit. Then add Docker sandboxing to contain tool execution. Set up SSH tunnels or Tailscale for safe remote access. Finally, lock down every channel with strict allowlists and mention gating.
For the latest configuration details, visit the OpenClaw Security documentation. Also check the OpenClaw Sandboxing reference, the Docker security best practices, and the Tailscale knowledge base. Start strict, stay updated, and audit regularly. Your production agent depends on it. Check out our Setup guide and our OpenClaw Skills guide